Unlock Your Shine: A Simple Guide on How to Make Lip Gloss at Home
Ever look at those perfectly shiny lips and wonder how they do it? Well, turns out you don't need to go to a fancy store to get that look. Making your own lip gloss at home is actually pretty straightforward. You can mix up your own batches with ingredients you might already have, or can easily get. It's a fun way to get exactly the color and feel you want, without all the extra stuff you don't. Let's get into how to make lip gloss that's all your own.
Key Takeaways
- You can create custom lip gloss at home using simple ingredients like natural oils, waxes, and colorants.
- Understanding the role of base oils (for shine), waxes (for structure), and emollients (for softness) helps in formulating your gloss.
- Gathering the right tools, such as heat-safe beakers and lip gloss tubes, is important for the process.
- Experiment with pigments like mica and natural extracts to achieve unique colors and effects.
- Simple recipes using ingredients like beeswax, coconut oil, shea butter, and castor oil can guide your first attempts at making lip gloss.
Gathering Your Lip Gloss Ingredients
Before you start mixing up your own shiny creations, it's good to know what goes into a basic lip gloss. Think of these as the building blocks for your perfect pout.
Understanding Base Oils for Shine
Base oils are what give your gloss that slick, hydrated feel and a nice sheen. They're the liquid part that carries everything else. You want oils that are good for your skin and melt nicely. Some popular choices include:
- Coconut Oil: It's solid at room temperature but melts easily, giving a smooth glide.
- Almond Oil: This one is lighter and absorbs well, great for keeping lips soft.
- Jojoba Oil: It's actually a liquid wax, and it's very similar to our skin's natural oils, so it works wonders for moisture.
These oils are the foundation, so picking ones you like the feel of is key.
Choosing the Right Waxes for Structure
Waxes are what give your lip gloss some body so it's not just a puddle of oil. They help it stay put on your lips and give it that slightly thicker texture. Common waxes you might use are:
- Beeswax: A classic choice, it provides a good balance of firmness and flexibility.
- Candelilla Wax: A vegan option that's a bit harder than beeswax, so you might need less of it.
- Carnauba Wax: Another vegan wax, it's quite hard and gives a nice glossy finish.
The amount of wax you use will really change the consistency. Too little, and it'll be runny; too much, and it might feel a bit stiff.
Selecting Emollients for Softness
Emollients are like the conditioners for your lips. They smooth out any rough patches and keep your lips feeling really soft and comfortable. Things like:
- Shea Butter: It's rich and creamy, perfect for extra hydration.
- Cocoa Butter: Smells lovely and adds a nice firmness along with moisture.
- Lanolin: A really effective moisturizer, though some people prefer to avoid it.
These add that extra layer of comfort and help your gloss feel luxurious.
Incorporating Pigments for Color
This is where you get to play with color! Pigments are what give your gloss its hue. You can use:
- Mica Powders: These give a shimmery or metallic look and come in tons of colors.
- Iron Oxides: These are natural earth pigments that provide matte or deeper colors.
- Titanium Dioxide: Often used to make colors more opaque or to create white or pastel shades.
| Pigment Type | Effect |
|---|---|
| Mica Powder | Shimmer/Metallic |
| Iron Oxide | Matte/Deep Color |
| Titanium Dioxide | Opaque/White |
Creating Your Custom Lip Gloss Base
Alright, so you've got your ingredients sorted. Now comes the fun part: actually making the gloss base. Think of this as the canvas for your lip art. It's not super complicated, but you do need to be a little careful with the heat.
Melting Natural Oils and Waxes
First things first, you'll need to melt your oils and waxes together. Grab a heat-safe beaker or a glass measuring cup. Then, set up a double boiler. If you don't have a fancy double boiler, no worries. Just put a few inches of water in a small pot and place your beaker inside it. You want the water to be simmering, not boiling like crazy. Add your chosen oils and waxes to the beaker. Stir them gently as they heat up. You're looking for everything to become a clear liquid. It usually doesn't take too long, maybe 5 to 10 minutes depending on your stove and how much you're making.
Here’s a general idea of the ratios you might use for a good base:
| Ingredient | Percentage |
|---|---|
| Castor Oil | 28% |
| Meadowfoam Seed Oil | 26% |
| Baobab Oil | 18% |
| Babassu Oil | 18% |
| Beeswax | 10% |
Cooling and Incorporating Colorants
Once everything is melted and looks like a smooth liquid, take the beaker off the heat. Let it cool down for a few minutes. You don't want it piping hot when you add your colorants, or they might not mix in properly. Now's the time to add your pigments, like mica powders or beetroot powder, to get that color you want. Start with a little bit and stir well. You can always add more if you want a deeper shade. Keep stirring until the color is evenly distributed. It's kind of like mixing paint, really. You want to avoid any clumps.
Be patient during this cooling stage. Adding colorants when the mixture is too hot can sometimes make them clump or not blend as smoothly as you'd like. A little bit of waiting goes a long way for a better final product.
Adding Flavor and Sweetness
If you're going for a flavored gloss, now's the moment. You can add a few drops of your favorite lip-safe flavor oil. Think vanilla, cherry, or even peppermint. Some people like to add a tiny bit of stevia for sweetness, too. Just a drop or two is usually enough. Stir it all in really well. Make sure the flavor and any sweetener are mixed throughout the base. This is what makes your gloss smell and taste nice, so don't skip it if that's important to you. Remember, you can always experiment with different flavor combinations later on.
Essential Materials for Homemade Gloss
To get started on your lip gloss making journey, you'll need a few key tools and containers. It's not complicated, but having the right stuff makes the whole process smoother and frankly, a lot less messy. Think of it like baking – you wouldn't try to make a cake without bowls and measuring cups, right? The same applies here.
Heat-Safe Beakers and Double Boilers
When you're melting oils and waxes, you need something that can handle the heat safely. Glass beakers or Pyrex measuring cups are perfect for this. You'll then place these into a pot with a bit of water, creating a makeshift double boiler. This method gently heats your ingredients without scorching them, which is super important for keeping your oils pure and your gloss from smelling burnt. You can buy dedicated double boilers, but a small saucepan and a heat-safe bowl or beaker works just fine to start.
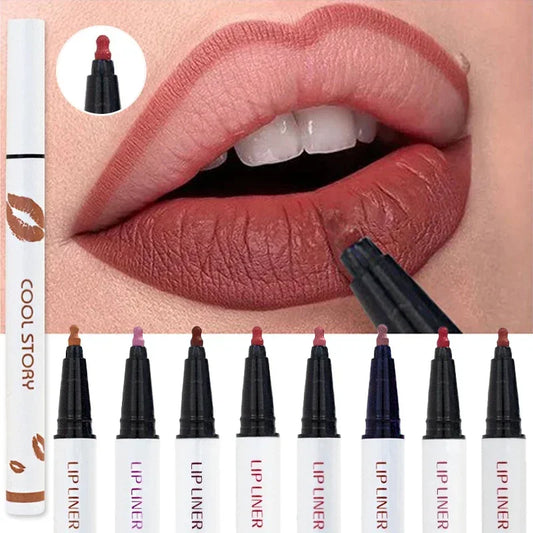
Lip Gloss Tubes and Applicators
Once your gloss is ready, you need something to put it in. Small, empty lip gloss tubes with their applicators are the standard. You can find these online in bulk, and they usually come with the wand and stopper already attached. Make sure they are clean and ready to go before you start pouring. If tubes aren't your thing, small pots or tins work too, though you'll need a separate lip brush to apply the gloss.
Measuring Tools for Precision
Getting the ratios right is key to a good lip gloss texture. You'll want some accurate measuring tools. A kitchen scale that measures in grams is really helpful for getting precise amounts of your oils and waxes, especially if you're following a specific recipe. If you don't have a scale, small measuring spoons and cups will do, but try to be as exact as possible. Even a few extra drops of oil can change how your gloss sets up.
Having the right equipment isn't about being fancy; it's about making the process easier and getting a better result. It means less chance of a sticky mess and more chance of a beautiful, smooth lip gloss.
Here’s a quick rundown of what you might need:
- Glass Beaker or Heat-Safe Bowl: For melting ingredients.
- Small Saucepan: To create the double boiler setup.
- Lip Gloss Tubes/Pots: To store your finished product.
- Lip Gloss Applicator Wands: If your tubes don't come with them.
- Kitchen Scale (optional but recommended): For accurate measurements.
- Measuring Spoons and Cups: If not using a scale.
- Stirring Rod or Spoon: For mixing ingredients.
- Small Funnel (optional): To help pour gloss into tubes neatly.
Customizing Your Lip Gloss Creations
Achieving Desired Colors with Mica and Extracts
So, you've got your basic gloss base ready, but it's looking a little… plain. That's where the fun really begins! Customizing the color is probably the most exciting part of making your own lip gloss. You can go for anything from a subtle tint to a bold statement. Mica powders are your best friend here. They come in a huge variety of colors and give a lovely shimmer. You can mix different micas to create unique shades. For example, a little bit of red mica with some gold mica can give you a really pretty coral. Don't be afraid to experiment! You can also use natural colorants like beetroot powder for pinks and reds, or cocoa powder for browns. Just remember to start with a tiny amount and add more until you get the color you want. It’s easier to add more color than to take it away!
Exploring Plumping and Shimmer Effects
Want lips that look a little fuller? Some ingredients can give you that plumping effect. Peppermint oil is a popular choice; it gives a slight tingle and can make your lips appear a bit puffier. Cinnamon oil can do something similar. Just be careful, as too much can be irritating. For shimmer, besides mica, you can also look into cosmetic-grade glitter. It adds a bit more sparkle than mica, perfect for a night out. You can also get creative with different finishes. Some glosses are super shiny, others have a subtle sheen, and some are packed with glitter. Think about the look you’re going for.
Avoiding Undesirable Ingredients
When you make your own lip gloss, you get to control exactly what goes in it. This is great for avoiding things you don't want. Many commercial lip glosses contain synthetic fragrances, artificial colors, or even ingredients that can dry out your lips over time. If you have sensitive skin or just prefer a more natural approach, stick to plant-based oils, natural waxes, and natural colorants. Always check the ingredient list of anything you're considering adding. It’s good to know what you’re putting on your lips, right?
Making your own lip gloss means you're in charge. You can skip the stuff you don't like and focus on what makes your lips feel good and look great. It’s all about making something that’s perfect for you.
Simple Recipes for How to Make Lip Gloss
Ready to get your hands a little messy and create some fantastic lip gloss? Making your own gloss at home is surprisingly straightforward, and you get to pick exactly what goes into it. Forget those mystery ingredients you can't pronounce; we're going all-natural here. Let's look at a few simple recipes to get you started on your DIY lip gloss journey.
Natural Oil and Beeswax Gloss Recipe
This is a classic for a reason. It’s simple, effective, and gives a lovely natural shine. You'll need a few things:
- 2 tablespoons of a good carrier oil (like coconut oil, almond oil, or jojoba oil)
- 1 tablespoon of beeswax pellets
- Optional: A few drops of your favorite essential oil for scent and flavor (peppermint or vanilla work well)
- Optional: A pinch of mica powder or beetroot powder for color
Here’s how you put it together:
- Combine the carrier oil and beeswax in a heat-safe beaker or a small pot. If you don't have a beaker, a glass measuring cup works too.
- Gently melt them together. The easiest way is using a double boiler setup. If you don't have one, just put a few inches of water in a saucepan and place your beaker or pot inside. Heat it on low until everything is liquid.
- Once melted, take it off the heat. If you're adding color or scent, stir them in now. Mix well to make sure the color is evenly distributed.
- Carefully pour the mixture into your clean lip gloss tubes or small pots. Work quickly because it starts to set as it cools.
- Let it cool completely. This might take a couple of hours. Once it's solid, your natural gloss is ready to use!
Remember to sterilize your containers before you start. This helps keep your homemade gloss fresh and safe.
Coconut Oil and Shea Butter Formulation
If you want something a bit more moisturizing, this recipe uses shea butter for extra creaminess. It’s great for lips that tend to get dry.
- 1 tablespoon coconut oil
- 1 tablespoon shea butter
- 1 teaspoon beeswax pellets
- Optional: Vitamin E oil for extra lip care
- Optional: A tiny bit of edible glitter or a natural colorant
Follow the same melting and mixing steps as the first recipe. The shea butter will make the final product a bit softer and more balm-like, which is lovely for dry lips.
Honey and Almond Oil Gloss Variation
This one adds a touch of sweetness and uses almond oil, which is known for being light and nourishing.
- 2 tablespoons almond oil
- 1 tablespoon beeswax pellets
- 1 teaspoon honey (use a liquid honey for easier mixing)
- Optional: A drop of cinnamon extract for a subtle tingle
When melting the almond oil and beeswax, add the honey right at the end, after you’ve taken it off the heat. Stir it in really well. Honey can make the mixture a bit stickier, so be prepared for that. It gives a nice, natural sheen and a hint of sweetness that’s quite pleasant.
Tips for Polished, Glossy Lips
Getting that perfect glossy lip look isn't just about the product you use; it's also about how you prep and maintain your lips. Think of it like getting a car ready for a shiny paint job – you wouldn't just slap the paint on a dirty surface, right? Same idea here.
Maintaining Lip Health for Natural Shine
Honestly, the best way to get a natural gloss is to have healthy lips to begin with. It sounds simple, but it makes a huge difference. If your lips are dry and flaky, no amount of gloss will look truly good. So, what can you do?
- Hydrate from the inside out: Drink plenty of water. It really does help keep your skin, including your lips, looking plump and healthy.
- Regular exfoliation: Gently buff away dead skin cells. You can use a soft toothbrush in a pinch or a simple sugar scrub. Just don't go too hard, or you'll irritate them.
- Moisturize consistently: Slap on a good lip balm throughout the day, especially before bed. Look for ingredients like shea butter, coconut oil, or beeswax. These are your best friends for soft lips.
- Protect from the elements: If you're going to be out in the sun or wind, use a lip balm with SPF. Sun damage can really dry out and damage your lips over time.
Taking care of your lips daily is the foundation for any beautiful lip look, glossy or otherwise. It’s about nurturing them so they have a natural radiance.
Enhancing Gloss with Makeup Techniques
Once your lips are in good shape, you can use makeup to really amp up the gloss factor. It’s not just about slapping on gloss; there are a few tricks.
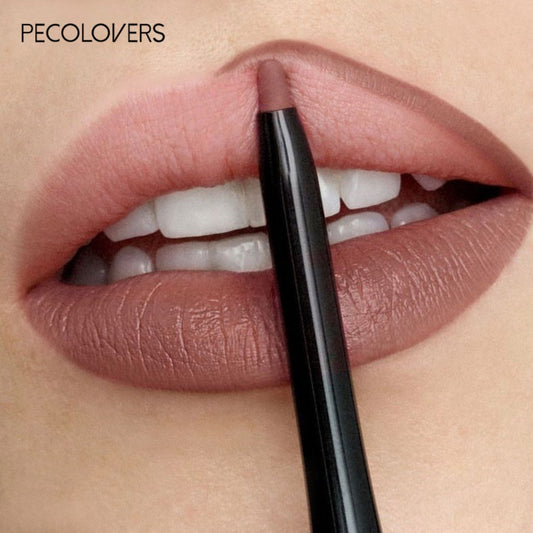
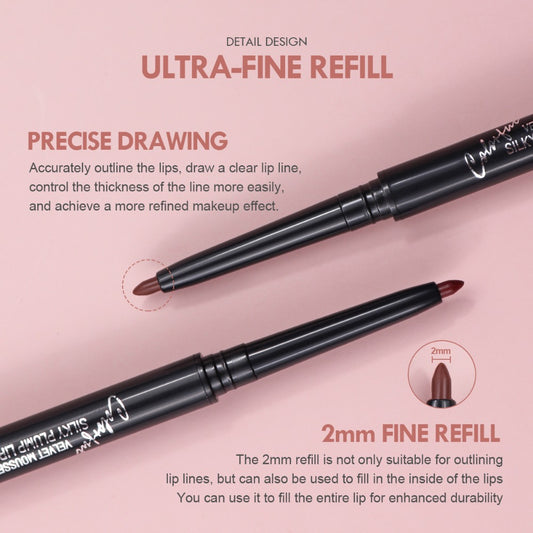
- Lip liner for definition: Using a lip liner that matches your natural lip color or your lipstick can help define your shape and keep your gloss from bleeding outside your lip line. It’s like a little fence for your color.
- Creamy lipstick base: If you're layering gloss over lipstick, opt for a creamy or satin finish. Matte formulas can be drying and make the gloss look patchy. Apply your lipstick evenly, making sure to get into all the nooks and crannies.
- Strategic gloss application: Apply your homemade gloss over your lipstick. For extra shine, you can add a second layer, focusing on the center of your lips. This creates a fuller, more pouty appearance.
- Highlighting the Cupid's bow: For an extra pop, dab a tiny bit of highlighter or a light-colored gloss right on the peak of your upper lip, the Cupid's bow. It catches the light and makes your lips look even more defined and plump.
Ensuring Your Gloss Lasts Longer
Nobody wants their beautiful glossy look to disappear after just a few sips of coffee. While glosses are generally not as long-lasting as matte lipsticks, there are ways to extend their wear.
- Start with a smooth base: As mentioned, well-moisturized and exfoliated lips help the gloss adhere better.
- Lip liner as a base: Applying a lip liner all over your lips before your lipstick and gloss can act as a primer, giving the color something to grip onto.
- Blotting and reapplying: After applying your first layer of gloss, gently blot your lips with a tissue. Then, apply a second layer. This helps to set the color and shine.
- Avoid oily foods: Very oily foods can break down the gloss formula faster. If you're eating something greasy, you might need to touch up more frequently.
- Carry your gloss: The simplest way to keep your gloss looking fresh is to have it with you. A quick touch-up throughout the day can revive the shine and keep your lips looking their best.
Want lips that look super shiny and smooth? Achieving that glossy finish is easier than you think! For the best tips and products to get your lips looking their absolute best, check out our website. You'll find everything you need to make your pout pop!
Shine On!
So there you have it! Making your own lip gloss at home is totally doable and honestly, pretty fun. You get to pick exactly what goes into it, steering clear of stuff you don't want and adding in all the good, hydrating ingredients. Plus, you can play around with colors and finishes until you get something that feels uniquely you. Don't be afraid to experiment with different oils, waxes, and pigments. The most important thing is to have a good time with it and enjoy your custom creation. Now go ahead, get creative, and let your lips do the talking!
Frequently Asked Questions
How do you make lip gloss at home?
You can totally make your own lip gloss right at home! You'll just need a few simple things like natural oils, some wax, and things to give it color. It's a fun way to create something unique just for you!
What oils do you use for lip gloss?
For a great lip gloss, you'll want to use oils that make your lips feel nice and look shiny. Good choices include castor oil, which gives a nice shine and helps plump lips, and other oils like coconut oil or almond oil that keep your lips soft and moisturized.
What ingredients should not be in lip gloss?
It's best to skip ingredients like parabens, petroleum jelly, and artificial fragrances. These can sometimes cause problems or aren't great for your skin. Our recipe uses natural stuff that's gentle and good for your lips.
What makes lip gloss so shiny?
That shiny look often comes from oils like castor oil. It makes your lips look glossy and also helps keep them hydrated. So, the right oils are key to getting that beautiful shine!
Is lip gloss good for lips?
Our DIY lip gloss is made with moisturizing ingredients that are actually good for your lips, helping to keep them from getting dry or chapped. If your lips get dry easily, you can even put on a little lip balm before your gloss for extra care.
How to make plumping lip gloss?
You can add a few drops of peppermint oil or cinnamon oil to your mix. These can make your lips feel a bit tingly and look fuller for a short time. Just add them to your melted gloss base before it cools down.