How Can You Make Lip Gloss: A Step-by-Step Guide to Creating Your Own Unique Shades
Ever wondered how you can make lip gloss at home? It's easier than you think! Crafting your own lip gloss lets you choose your favorite colors, scents, and ingredients. Plus, it's a fun project to do solo or with friends. From picking the right tools and mixing the ingredients to customizing with unique shades, this guide will walk you through each step. Whether you're looking for vegan options or want to make a special gift, there's something for everyone. Let's dive into the world of homemade lip gloss and see how creative you can get!
Key Takeaways
- Making lip gloss at home allows for full customization of colors and scents.
- Basic ingredients include oils like coconut and castor, along with beeswax or shea butter.
- Experiment with natural colorants like beetroot powder for vibrant shades.
- Ensure your lip gloss is vegan or allergy-friendly by choosing the right ingredients.
- Proper storage extends the shelf life of your homemade lip gloss.
Understanding the Basics of Lip Gloss Making

Essential Ingredients for Homemade Lip Gloss
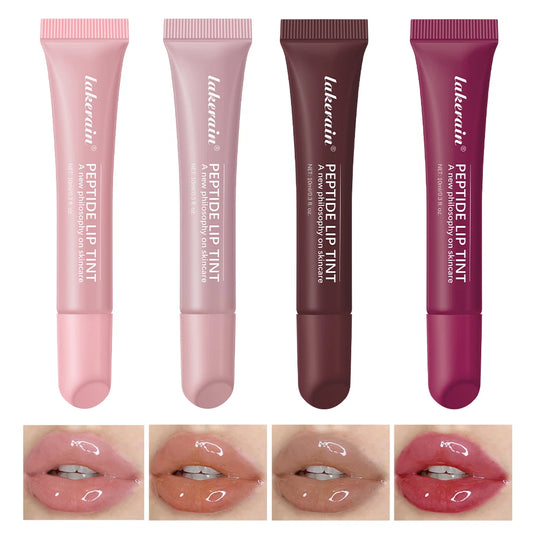
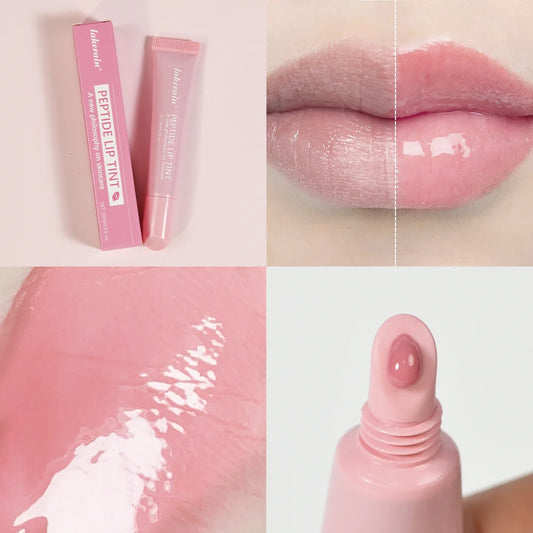
Creating your own lip gloss starts with picking the right ingredients. The foundation of any good lip gloss is its emollient base, which gives it that smooth, shiny finish. Common emollients include oils like coconut, olive, or jojoba oil. These not only provide gloss but also help keep your lips moisturized. Wax is another key ingredient, often beeswax or candelilla wax, which helps the gloss stick and gives it a thicker texture. You might also add pigments for color and essential oils for scent. Some even include vitamin E for an extra nourishing touch.
Choosing the Right Tools and Containers
When it comes to making lip gloss, having the right tools can make a world of difference. You'll need a double boiler or a heat-safe bowl to melt your ingredients. A pipette or small funnel can help you pour your mixture into containers without making a mess. Speaking of containers, think about how you want to use your gloss. Lip gloss tubes with applicators are convenient, while small pots can be perfect for a thicker formula you apply with a brush or your finger. Explore different options to see what suits your style best.
Safety Tips for DIY Lip Gloss
Safety first, especially when you're dealing with beauty products. Always use cosmetic-grade ingredients to avoid any skin irritation. It's a good idea to test a small amount of your finished product on your skin before applying it to your lips. Keep your workspace clean and organized to avoid contamination. And remember, some ingredients can trigger allergies, so be mindful of what you use if you have sensitive skin or allergies. Making your own lip gloss can be fun and safe if you follow these simple precautions.
Step-by-Step Process to Make Your Own Lip Gloss
Setting Up Your Workspace
Creating your own lip gloss requires a bit of preparation. Start by arranging a clean and organized workspace. You'll want to set up near a stove or a heat source, as you'll need to melt some ingredients. Gather all your materials, including oils, waxes, and pigments, and have your containers ready. Preparation is key to a smooth and enjoyable DIY experience.
Melting and Mixing Ingredients
Once your workspace is ready, it's time to start melting your ingredients. You'll typically use a double boiler for this step. Begin by melting beeswax or shea butter, which acts as the base. Gradually add oils like coconut or castor oil for shine and moisture. Stir in your chosen colorants and essential oils for fragrance. Keep stirring until everything is well combined and smooth. If you don't have a double boiler, a heat-resistant bowl over a pot of boiling water works just as well.
Pouring and Cooling the Lip Gloss
With your mixture ready, it's time to pour it into containers. Use a small funnel or a pipette to transfer the liquid gloss into lip gloss tubes or small jars. Let the gloss cool at room temperature until it solidifies. This is when you'll see the final texture and color of your homemade product. Once cooled, seal the containers tightly.
Making lip gloss at home isn't just about creating a beauty product; it's an opportunity to experiment with different textures, colors, and scents. Whether you're crafting a Fruit Flavor Color Change Lip Glaze or a Glitter Glam Long-Lasting Lip Gloss, the process is both fun and rewarding. Enjoy the creativity and personalization that comes with making your own lip gloss!
Customizing Your Lip Gloss for Unique Shades

Using Natural Colorants for Vibrant Hues
Creating your own lip gloss means you get to play with colors, and natural colorants are a great way to do this. Beetroot powder is a popular choice, offering a range from light pink to deep red. Mixing it with your gloss base or dissolving it in vegetable glycerin can give you that perfect shade. Hibiscus powder is another natural option for vibrant pinks and reds. For a rich, chocolatey tint, cocoa powder works wonders. You can also experiment with clays, herbs, and other root powders to discover an array of colors.
The beauty of using natural colorants is the endless possibility to mix and match, creating a truly personalized lip gloss that reflects your unique style.
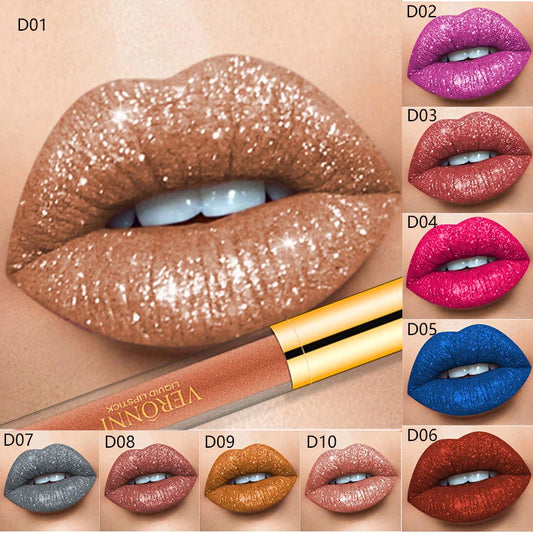
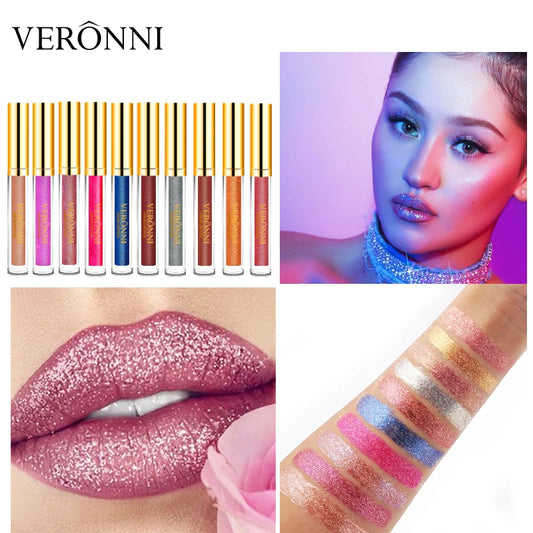
Adding Shimmer and Sparkle
Who doesn’t love a bit of sparkle? Adding shimmer to your lip gloss can elevate it from simple to stunning. You can use natural ingredients like gold glitter mica or rose mica. For a more glittery effect, look for cosmetic-grade edible glitter. Just remember, craft glitter is a no-go since it's not skin-friendly. Adjust the levels of shimmer to find the perfect balance that catches the light just right.
Experimenting with Flavors and Scents
Adding flavors and scents to your lip gloss can make it even more enjoyable to use. Essential oils are a fantastic way to add a hint of fragrance. Peppermint oil, for example, not only smells great but also gives a refreshing tingle. Vanilla extract or citrus oils can add a sweet or zesty note. Be sure to use skin-safe and food-grade oils to keep your lip gloss safe and delightful to use.
Exploring Vegan and Allergy-Friendly Lip Gloss Options
Vegan Alternatives to Common Ingredients
Making lip gloss at home can be fun, especially when you're looking to create a vegan-friendly version. Some common ingredients in lip gloss, like beeswax or lanolin, aren't vegan. But don't worry, there are great alternatives out there. Candelilla wax is a fantastic substitute for beeswax. It's plant-based and helps give your gloss that perfect texture. Soy wax is another option, and it works just as well. For the creamy base, you might consider using kokum butter or shea butter, both of which are vegan and very nourishing for the lips.
Creating Nut-Free Lip Gloss
If you're concerned about nut allergies, there are simple swaps you can make. Many lip gloss recipes call for almond oil or other nut oils, but you can easily replace these with coconut oil or olive oil. Both of these oils are not only safe for those with nut allergies, but they're also super moisturizing and healthy for your lips. Cocoa butter is another excellent choice, offering a rich texture without the nutty risk.
Ensuring Gluten-Free Formulations
While many lip glosses are naturally gluten-free, it's always good to double-check, especially if you're adding flavorings or colorants. Look for gluten-free labels on any additional ingredients you plan to use. Ingredients like beeswax, coconut oil, and cocoa butter are naturally gluten-free and can form the base of your gloss. When adding flavors or scents, make sure they are labeled gluten-free to avoid any issues. Experimenting with natural colorants like beetroot powder or cocoa powder can give your lip gloss beautiful hues while keeping it gluten-free.
Crafting your own lip gloss at home allows you to control what goes into it, ensuring it meets your dietary preferences and allergy requirements. Whether you're looking for vegan, nut-free, or gluten-free options, there's a solution for everyone. Plus, you get to customize the color, scent, and texture to your liking, making it a truly personal product.
Tips for Storing and Maintaining Your Homemade Lip Gloss
Ideal Storage Conditions
Keeping your homemade lip gloss fresh and effective means storing it right. Room temperature is your best friend—aim for somewhere between 68°F and 77°F (20°C to 25°C). This helps maintain the consistency and quality of your gloss. A cool, dark spot is ideal to prevent any ingredients from breaking down due to light exposure.
Extending the Shelf Life
Want your lip gloss to last longer? Here are some handy tips:
- Use airtight containers to keep air and moisture out. This helps preserve the texture and effectiveness of your gloss.
- Properly label each container with the date of creation. This way, you'll know when it's time to make a new batch.
- Consider adding a natural preservative, like vitamin E oil, which can help extend the life of your product.
Troubleshooting Common Issues
Even with the best storage practices, sometimes things go a bit off. Here’s how to tackle some common hiccups:
- Separation: If your gloss starts to separate, give it a gentle stir or shake. If it continues, it might be time to whip up a new batch.
- Change in Smell or Color: If your gloss smells funky or changes color, it’s probably gone bad. Toss it and start fresh.
- Texture Problems: If it becomes too thick or too runny, adjust your recipe next time. A little more or less wax can make a big difference.
Storing your homemade lip gloss properly not only keeps it fresh but also ensures that every application feels just as good as the first. Crafting your own gloss is a fun and rewarding process, and with the right care, your creations can be enjoyed for months to come.
Creative Ideas for Themed Lip Gloss Creations

Seasonal and Holiday-Themed Lip Gloss
Creating themed lip glosses adds a fun twist to your beauty routine, perfect for celebrating special occasions. Imagine a Christmas-themed gloss with a hint of peppermint or cinnamon oil and a sprinkle of red or green glitter. For Halloween, why not try a dark, mysterious shade with a hint of black cherry scent? You can also play with colors and scents to match any holiday or season, making each gloss a unique celebration.
Gift Ideas for Friends and Family
Handmade lip glosses make thoughtful gifts. Personalize them by choosing colors and scents that suit the recipient. Consider a Color-Changing Glitter Lip Gloss Set for a friend who loves surprises, or create a custom blend with their favorite flavors and shades. Package them in cute containers, and you've got a gift that shows you care.
Incorporating Personal Touches
Add a personal touch to your gloss creations by experimenting with different ingredients. Use natural colorants like beetroot or hibiscus powder for a pop of color. Add a dash of shimmer with cosmetic-grade glitter or mica powder for that extra sparkle. You could even infuse your gloss with essential oils like lavender or vanilla for a soothing scent. For something truly unique, try the GlimmerGlow Lip Oil for a dazzling finish. These little details make your homemade glosses truly one-of-a-kind.
Looking for fun and unique ideas to create themed lip gloss? You can mix colors, add sparkles, or even use fruity flavors to make your gloss stand out! Whether it's for a party or just for fun, the possibilities are endless. Check out our website for more inspiration and to find the perfect supplies for your next lip gloss project!
Conclusion
Making your own lip gloss at home is a fun and rewarding project. You get to play around with different ingredients and colors, creating something that's uniquely yours. Plus, you know exactly what's going into it, so you can keep it natural and safe. Whether you're whipping up a batch for yourself or as a gift, the process is pretty straightforward once you get the hang of it. So grab your ingredients, follow the steps, and enjoy the satisfaction of making your own lip gloss. It's a little messy, sure, but that's part of the fun. And who knows? You might just find your new favorite shade in the process.
Frequently Asked Questions
How can I make lip gloss at home?
Making lip gloss at home is simple. Mix 2 tablespoons of petroleum jelly with a teaspoon of lipstick or blush for color, and a few drops of essential oil for scent. Heat in the microwave for about 10-30 seconds, stir well, and pour into a small container or tube.
What ingredients are needed for lip gloss?
You need a few oils like castor oil for shine, coconut oil for moisture, and beeswax for thickness. You can also add vitamin E for nourishment and essential oils for scent.
What is a basic recipe for lip gloss?
A basic lip gloss can be made with 1 tablespoon of beeswax, 2 tablespoons of sweet almond oil, and a few drops of essential oil. Melt the ingredients, mix well, and pour into containers.
How do I start my own lip gloss line?
To start a lip gloss line, plan your brand, set a budget, choose your colors and containers, and design your logo and packaging. Then, start creating and testing your products.
What are some popular oils for homemade lip gloss?
Popular oils include olive oil, coconut oil, jojoba oil, and sweet almond oil. These oils help create a smooth and shiny texture.
How can I make my lip gloss unique?
You can personalize your lip gloss by adding natural colorants like beetroot powder, using different essential oils for scent, or adding shimmer with mica powder.