DIY Delight: How Can You Make Lip Gloss at Home?
Share
Ever look at your favorite lip gloss and think, 'I could totally make that myself'? Well, you probably can! Making your own lip gloss at home is a surprisingly simple and fun way to get exactly the color, shine, and feel you want. Forget those expensive tubes with ingredients you can't pronounce; we're talking about creating something custom, just for you. So, how can you make lip gloss that's both fabulous and easy to whip up? Let's get started on this DIY beauty adventure!
Key Takeaways
- You can create personalized lip gloss using common household items and a few key beauty ingredients.
- Experimenting with different pigments, like eyeshadow or mica powder, allows for custom color creation.
- Bases like Vaseline or oils provide moisture, while Versagel offers a more professional, less sticky finish.
- Adding flavors, scents, and beneficial oils can boost your homemade gloss's appeal and lip-loving properties.
- Understanding basic formulation helps troubleshoot issues like consistency and separation for a smooth application.
Understanding the Basics of Homemade Lip Gloss
Making your own lip gloss at home might sound a bit complicated, but honestly, it's pretty straightforward once you get the hang of it. It's a fun way to get exactly the color and feel you want for your lips, without having to hunt through a million different brands. Plus, you know exactly what's going into it, which is always a nice bonus.
Essential Ingredients for Your Glossy Creation
To get started, you'll need a few key things. The base is usually something like Vaseline or a nice oil, like coconut or almond oil. These give it that smooth, slick feel. Then, for color, you can use things like mica powders or even a bit of eyeshadow – just make sure it's cosmetic grade! If you want it to smell good, a drop of essential oil or a bit of flavoring extract works wonders. It’s all about mixing and matching to find what you like best.
Gathering Your DIY Lip Gloss Supplies
Beyond the ingredients, you'll need some tools. Think small, clean containers to put your finished gloss in – little pots or tubes work great. You'll also want something to mix with, like a small spatula or even a toothpick. A little bowl or beaker for melting your base is handy, and a way to heat it gently, like a double boiler setup or even a microwave if you're careful. Don't forget a clean surface to work on!
Preparing Your Workspace for Gloss Making
Before you start mixing, it's a good idea to set up your space. Cover your counter with some old newspaper or paper towels. This makes cleanup way easier, trust me. Make sure everything you need is within reach so you're not scrambling around with sticky fingers. It’s also a good idea to have some paper towels or a damp cloth nearby for any little spills. Cleanliness is pretty important here, so wash your hands well before you begin.
Crafting Your Custom Lip Gloss Shade
Achieving the Perfect Tint with Pigments
Want to make your lip gloss look as good as it feels? Coloring your homemade gloss is where the real fun begins. You can get a lovely tint using a few different things. Mica powders are super popular because they give a nice shimmer and come in tons of colors. You can also use a tiny bit of eyeshadow or blush – just make sure it’s cosmetic grade and finely milled so it doesn’t feel gritty on your lips. A little goes a long way, so start with a small amount and add more until you get that perfect shade. Experimenting with different pigments is key to finding your signature color.
Exploring Color Combinations for Unique Hues
Don't stop at just one color! Mixing pigments can create really unique shades you won't find anywhere else. Think about combining a soft pink mica with a touch of gold for a peachy glow, or maybe a deep berry pigment with a hint of shimmer for a dramatic look. You can even use a tiny bit of lipstick or a colored lip balm as your tint source. Just melt it down with your gloss base. It’s all about playing around and seeing what looks good to you. Remember, you can always add more color, but you can't take it away, so build up your shades slowly.
Adding Shimmer and Sparkle to Your Gloss
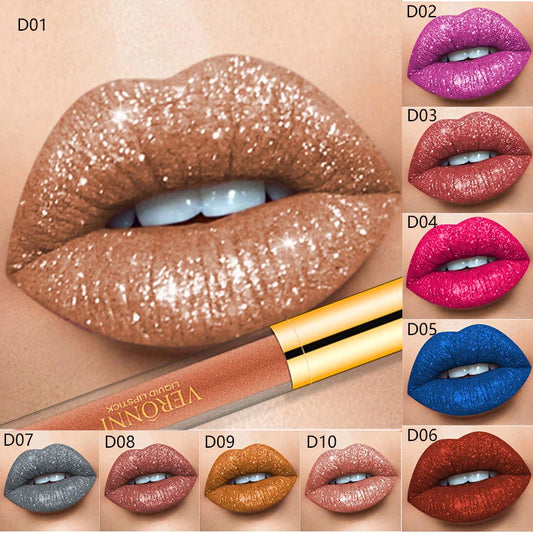
Who doesn't love a little sparkle? Adding shimmer or glitter can totally change the vibe of your lip gloss. Cosmetic-grade glitter is a must here – you don't want anything that could irritate your lips. Fine glitter particles give a subtle sheen, while larger ones can make a bolder statement. You can also find iridescent glitters that shift color in the light, which is pretty cool. Just like with pigments, start with a small amount of glitter and mix it in well. You want that sparkle distributed evenly, not clumped up in one spot. It’s a simple way to make your homemade gloss look super professional and eye-catching.
Simple Methods for How Can You Make Lip Gloss

Making your own lip gloss at home can be a really fun project, and it's not as complicated as you might think. You can get exactly the color and feel you want without having to buy a bunch of different products. Plus, you know exactly what's going in it, which is always a nice bonus.
Vaseline-Based Gloss: A Moisturizing Foundation
Vaseline is a super common base for homemade glosses because it's really good at keeping moisture in. It's thick and creates a nice barrier on your lips. To make a basic Vaseline gloss, you'll need a small amount of Vaseline, of course, and then you can add color. A little bit of eyeshadow or blush works great for tinting. Just scrape a tiny bit of your chosen color into a small bowl with some Vaseline. You can gently warm it up – maybe in the microwave for just a few seconds, or over a double boiler – to help everything mix smoothly. Stir it until the color is evenly distributed. Then, carefully spoon it into a clean, small container. Let it cool completely before you try to use it. This method is fantastic for a simple, hydrating gloss that’s easy to whip up.
Oil-Infused Gloss for Hydration and Shine
If you want something a bit lighter than Vaseline, or you're looking for extra lip-loving benefits, oils are the way to go. Think about using things like coconut oil, almond oil, or even castor oil. These oils are naturally moisturizing. You can combine a liquid oil with a thicker one, or even add a bit of beeswax if you want it to be a little more solid. To make it, gently melt your chosen oils and beeswax together. Once melted, you can add your colorant – mica powders or even a tiny bit of lipstick work well here. Stir everything together really well. Pour it into your container and let it set. It gives a lovely shine and feels great on the lips.
Using Versagel for a Professional Finish
For a gloss that really looks and feels like the store-bought kind, Versagel is a popular ingredient. It's a pre-made gel base that gives a really nice, thick, and non-sticky consistency. You can buy it online or at craft stores that sell cosmetic supplies. To use it, you'll typically warm the Versagel slightly, then mix in your colorants (like mica powders or liquid pigments) and any desired scents or flavors. Because Versagel is already a gel, it usually mixes in quite easily. You'll want to stir it thoroughly to make sure the color is uniform. Then, just pour it into your gloss tubes or pots. It sets up nicely and gives a really professional-looking finish. It’s a bit more involved than the Vaseline or oil methods, but the result is often worth it if you’re aiming for that salon-quality shine.
Enhancing Your Homemade Lip Gloss
So, you've got your basic gloss down, but what if you want to take it up a notch? Making your own lip gloss is awesome because you can really play around with it. It's not just about the color; you can make it smell amazing and even add stuff that's good for your lips. Plus, how you package it can make it feel super special, like something you'd actually buy.
Incorporating Flavors and Scents
Who doesn't love a lip gloss that smells as good as it looks? You can add a few drops of food-grade flavoring oils to your melted gloss base. Think vanilla, peppermint, or even fruit flavors like strawberry or cherry. Just a little goes a long way, and it makes applying your gloss a much more pleasant experience. Be careful not to add too much, or it can get a bit overpowering.
Adding Beneficial Oils for Lip Health
Beyond just looking good, your homemade gloss can actually do some good for your lips. You can mix in extra nourishing oils. Things like vitamin E oil are great antioxidants, and jojoba oil is really similar to our skin's natural oils, so it absorbs well. Coconut oil is also a popular choice for its moisturizing qualities. Just remember to add these to your melted base before it starts to set.
Creative Packaging for Your Gloss Creations
Presentation really matters, right? You can buy small, empty lip gloss tubes or little pots online. They come in all sorts of shapes and sizes. You can even get ones with little applicators attached. For a personal touch, consider adding a cute label with the name of your gloss or the ingredients. It makes your creation feel more professional and is a nice way to share your DIY skills with friends.
Troubleshooting Common DIY Lip Gloss Issues
So, you've whipped up your own lip gloss, and maybe it's not quite hitting the mark. Don't sweat it! Most of us run into a few snags when we're first starting out. It's all part of the learning curve, right? Let's talk about how to fix those little oopsies.
Achieving the Right Gloss Consistency
Sometimes your gloss comes out too thick, like a balm, or way too thin and runny. If it's too thick, try gently warming it up and adding a tiny bit more liquid oil, like fractionated coconut oil or sweet almond oil. Just a few drops at a time! If it's too thin, you might need to add a bit more of your thickening agent, like beeswax or shea butter, but do this very carefully. You can also try adding a bit more of your base gloss product if you used something like Versagel. The key is to add ingredients slowly and mix well after each addition.
Here’s a quick guide:
- Too Thick: Add liquid oil (e.g., coconut, almond) drop by drop.
- Too Thin: Add a tiny bit more beeswax or shea butter (melted first), or more Versagel.
- Too Oily/Greasy: Try adding a bit more of your base gloss or a touch more beeswax.
Preventing Separation in Your Mixture
Ever notice little oil droplets pooling on top of your gloss? That's separation, and it usually happens when the ingredients aren't fully combined or if there's a big temperature change. Make sure you're mixing everything really thoroughly, especially when you're adding pigments or flavors. If you're using ingredients that don't naturally mix well, like water-based and oil-based components (though most glosses are oil-based), you might need an emulsifier, but for most simple glosses, good mixing is the answer. Letting it cool slowly and undisturbed can also help.
Sometimes, the simplest fix is just giving your gloss a good stir before each use. It's like waking up your ingredients to make sure they're all playing nicely together.
Ensuring a Smooth and Non-Sticky Application
Nobody likes a gloss that feels like glue on their lips. Stickiness is often caused by too much of a thickening agent, like beeswax, or not enough of a slip agent. If your gloss is sticky, try adding a bit more of a lighter oil, like jojoba oil or even a touch of silicone-based product if you're comfortable with that. Also, make sure your pigments are finely milled; larger particles can sometimes make the texture feel gritty or draggy. A tiny bit of Vitamin E oil can also help improve the glide and feel.
Exploring Advanced Lip Gloss Techniques
Ready to take your homemade lip gloss game to the next level? We've covered the basics, but there's a whole world of cool stuff you can do to make your gloss truly unique and professional-looking. It’s not just about slapping some color in there; it’s about creating effects and textures that really stand out.
Creating Multi-Dimensional Gloss Effects
Want your gloss to have that extra pop? Think about adding layers of shimmer or using pigments that shift color depending on the light. You can mix fine iridescent glitters with your base gloss for a subtle sparkle, or go bolder with larger holographic flakes. Another trick is to swirl two slightly different colored glosses together in the container before they fully set. This creates a marbled or layered look that’s really eye-catching. Playing with different particle sizes of shimmer is key to achieving a sophisticated, multi-dimensional finish.
DIY Lip Gloss Kits for Beginners
If you're feeling a bit intimidated by all the advanced options, starting with a DIY lip gloss kit can be a great idea. These kits usually come with pre-measured ingredients, specialized bases like Versagel, and sometimes even colorants and glitters. They take a lot of the guesswork out of the process, letting you focus on the fun part: customization. It’s a good way to get a feel for different textures and finishes without having to buy a ton of individual supplies. Plus, they often come with clear instructions, making the whole experience much smoother.
The Science Behind Gloss Formulation
Ever wonder why some glosses are super sticky and others glide on like silk? It all comes down to the formulation. The base ingredients, like oils and waxes, determine the texture and how long it lasts. Thickeners, such as certain polymers or even just careful heating and cooling, affect the viscosity. Pigments and glitters need to be compatible with the base so they don't clump or separate. Understanding these basic principles can help you troubleshoot issues and create glosses with specific properties, like a plumping effect or a super long-lasting shine. It’s a bit like baking; the right ratios make all the difference.
Want to make your lips pop? We're diving into cool ways to use lip gloss that you might not have thought of. From creating a super shiny look to making your lips appear fuller, there are lots of fun tricks. Ready to learn how to get the best pout? Visit our website to discover all the amazing lip gloss techniques!
Your Glossy Creation Awaits!
So there you have it! Making your own lip gloss is totally doable and honestly, pretty fun. You can play around with different colors and even scents to make something that’s really you. It’s a great way to get creative and have a product that’s perfectly suited to your style. Plus, you know exactly what’s going into it, which is always a good thing. Give it a try – you might just surprise yourself with what you can whip up!
Frequently Asked Questions
What basic ingredients do I need to make lip gloss at home?
You can make lip gloss at home using simple ingredients like Vaseline, coconut oil, or Versagel as a base. You'll also need colorants like mica powder or eyeshadow, and optional additions like flavor oils or vitamin E for extra benefits. It's a fun way to create custom shades and textures!
How can I add color and shimmer to my homemade lip gloss?
To get the perfect color, you can use things like mica powders, which come in lots of shades, or even a little bit of your favorite colored eyeshadow. You can mix and match these to create unique colors or add a touch of shimmer with cosmetic glitter.
My lip gloss is too thick or too thin. How can I fix the consistency?
If your lip gloss turns out too thick, try adding a little more liquid oil, like coconut or jojoba oil. If it's too thin, you might need to add a bit more of your base ingredient, like Vaseline or Versagel, or a tiny bit of beeswax to help it set.
Can I make my lip gloss smell or taste good?
You can add flavors like a drop of food-grade flavoring oil (like vanilla or strawberry) or essential oils that are safe for lips, such as peppermint or sweet orange. This makes your gloss smell and taste great!
What can I add to my lip gloss to make it good for my lips?
Yes, you can add nourishing oils like vitamin E, almond oil, or castor oil to your lip gloss. These oils are great for keeping your lips moisturized and healthy, making your gloss both pretty and good for your pout.
How should I store my homemade lip gloss?
It's best to store your homemade lip gloss in clean, airtight containers, like small pots or tubes. Keep them in a cool, dry place away from direct sunlight to make sure they last as long as possible.


